admin
Hanky Panky


Step into the world of classic cocktails with a drink that’s as intriguing as its name: the Hanky-Panky. This timeless concoction, born in the bustling bars of London in the early 20th century, offers a sophisticated blend of gin, sweet vermouth, and a secret ingredient that elevates it to legendary status. If you’re looking to impress your guests or simply treat yourself to a perfectly balanced and aromatic libation, mastering the Hanky-Panky is an absolute must. It’s surprisingly easy to make, yet delivers a complex flavor profile that will delight even the most discerning palate. Forget complicated mixology; this recipe solves the problem of wanting a classic, elegant drink without needing a bartender’s degree.
Why You’ll Love This Hanky-Panky Recipe
Timeless Elegance: A classic cocktail with a rich history, perfect for any sophisticated gathering.
Unique Flavor Profile: The unexpected addition of Fernet-Branca creates a wonderfully complex and aromatic experience.
Simple to Master: Despite its sophisticated taste, the Hanky-Panky cocktail recipe is straightforward to prepare, even for novice mixologists.
Impress Your Guests: This drink is a guaranteed conversation starter and a testament to your refined taste.
Ingredients You’ll Need
To craft the perfect Hanky-Panky, you’ll need just a few high-quality ingredients. The simplicity of the list belies the depth of flavor it creates.
2 oz (60ml) Dry Gin (a good quality London Dry Gin works best)
2 oz (60ml) Sweet Red Vermouth
2 dashes Fernet-Branca
Orange peel, for garnish
Ice
How to Make Hanky-Panky: Step-by-Step Guide
Creating this classic fernet branca cocktail is a straightforward process. Follow these steps for a perfectly chilled and balanced drink every time.
Chill Your Glass: Place a chilled coupe or martini glass in the freezer or fill it with ice water while you prepare the drink.
Combine Ingredients: In a mixing glass, add the gin, sweet vermouth, and Fernet-Branca.
Add Ice: Fill the mixing glass with fresh ice cubes.
Stir Thoroughly: Stir the mixture gently for about 20-30 seconds. This chills and slightly dilutes the drink, ensuring a smooth finish. Stirring is preferred over shaking for spirit-forward cocktails to maintain clarity and texture.
Strain: Discard the ice from your chilled glass and strain the cocktail into it.
Garnish: Express the oils from an orange peel over the drink by twisting it, then drop it into the glass or drape it over the rim. This adds a beautiful aromatic touch.
Tips for Success
Achieving the perfect Hanky-Panky is all about attention to detail. Here are a few pro tips to elevate your mixology game:
Quality Ingredients Matter: Since there are only a few components, the quality of your gin and sweet vermouth will significantly impact the final taste. Invest in good brands for a truly exceptional classic gin cocktail.
Don’t Skimp on Stirring: Proper stirring is crucial for chilling and diluting the drink to the right level. A well-chilled drink is always more enjoyable. This also helps to integrate the bold flavors of the Fernet-Branca.
Fresh Garnish: Always use a fresh orange peel for garnish. The aromatic oils released when you express the peel add a vital layer of complexity to the drink, enhancing the overall experience of this sweet vermouth drink.
Recipe Variations
The Hanky-Panky is a classic, but a few tweaks can introduce exciting new dimensions:
Smoky Twist: For a subtle smoky note, rinse your chilled glass with a peated Scotch before pouring in the cocktail. Discard the Scotch, leaving just the aroma.
Herbal Infusion: Experiment with different bitters. Instead of Fernet-Branca, try a dash of Angostura or Peychaud’s bitters for a slightly different herbal profile. This can alter the traditional hanky panky cocktail recipe but offers a delightful alternative.
Citrus Zest: While orange peel is traditional, a lemon peel can offer a brighter, more zesty aroma, providing a refreshing contrast to the rich vermouth.
Frequently Asked Questions (FAQ)
How do I store this Hanky-Panky?
The Hanky-Panky is best enjoyed immediately after preparation. Like most spirit-forward cocktails, its delicate balance of flavors and temperature will diminish if stored. If you have leftover mixed ingredients (before chilling and diluting), you can store them in an airtight container in the refrigerator for a day or two, but it’s always best to mix fresh.
Can I prepare it in advance?
While you can pre-batch the gin and sweet vermouth mixture (without the Fernet-Branca, which is best added fresh) and store it in the refrigerator, it’s highly recommended to add the Fernet-Branca and stir with ice just before serving. This ensures optimal chilling, dilution, and the freshest aromatic notes from the Fernet-Branca and orange peel. Pre-batching the base can save time when entertaining a crowd.
What can I serve it with?
The rich, complex flavors of the Hanky-Panky pair wonderfully with savory appetizers. Consider serving it alongside charcuterie boards, aged cheeses, olives, or even small bites like mushroom crostini. Its herbal notes also make it a great aperitif to stimulate the appetite before a hearty meal. For a truly classic experience, enjoy it on its own as a sophisticated evening drink.
Conclusion
The Hanky-Panky is more than just a drink; it’s a journey back to the golden age of cocktails, offering a perfect blend of history, elegance, and unforgettable flavor. Its unique character, thanks to the intriguing addition of Fernet-Branca, sets it apart from other classic gin cocktails. Whether you’re a seasoned mixologist or just starting your home bar adventure, this hanky panky cocktail recipe is a must-try. So, gather your ingredients, follow our simple guide, and prepare to savor a truly exceptional libation. Don’t forget to leave a comment below if you try this recipe and let us know what you think!
Greg’s Onion Soufflé Dip

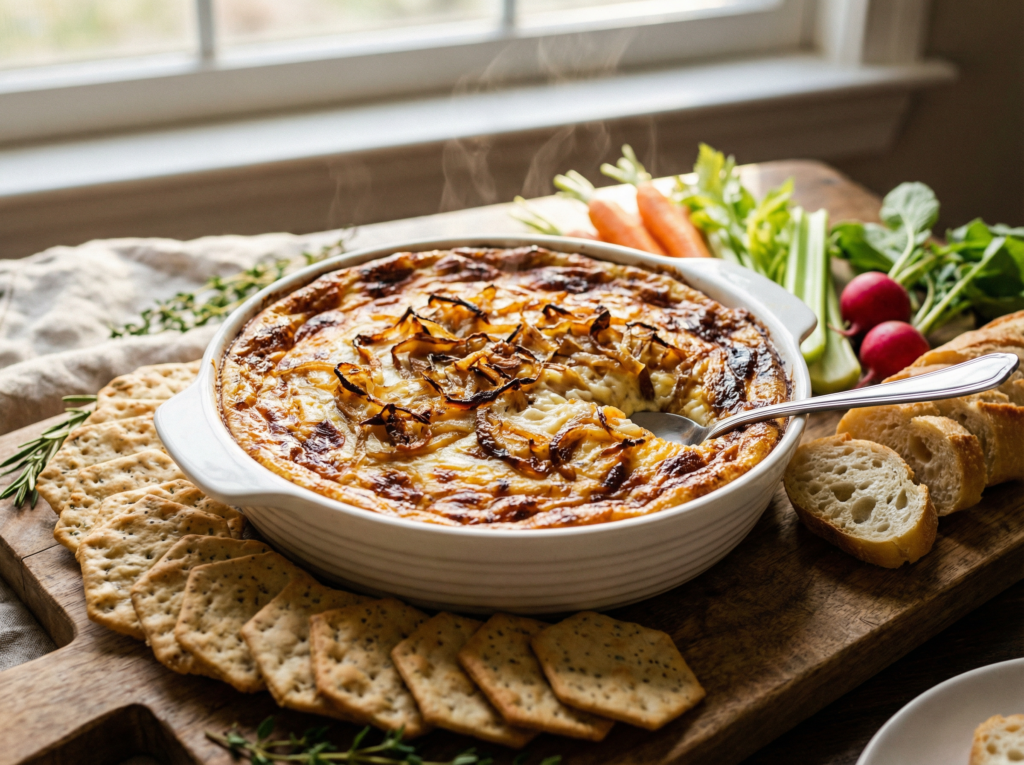
Welcome to the ultimate guide for creating a truly unforgettable appetizer: Greg’s Onion Soufflé Dip. This recipe isn’t just another dip; it’s a culinary experience that combines the rich, savory flavors of caramelized onions with the creamy, airy texture of a soufflé. Perfect for any gathering, from casual game nights to elegant dinner parties, this easy onion soufflé dip is guaranteed to be a crowd-plepleaser and leave your guests asking for the recipe. Forget bland, store-bought options; this homemade onion dip elevates a classic to gourmet status with minimal effort and maximum flavor.
Why You’ll Love This Greg’s Onion Soufflé Dip Recipe
Irresistibly Creamy & Flavorful: The combination of sweet, tender onions and a rich, cheesy base creates a dip that’s both comforting and sophisticated.
Simple Ingredients: You won’t need a long list of exotic items. This recipe relies on readily available ingredients that come together to create something extraordinary.
Perfect for Any Occasion: Whether it’s a holiday party, a casual get-together, or a cozy night in, this hot onion soufflé dip is always a hit.
Make-Ahead Friendly: Prepare it in advance and bake it just before serving, making entertaining a breeze.
Ingredients You’ll Need
1 (14-ounce) package frozen chopped onions, thawed and drained
2 (8-ounce) packages cream cheese, softened
1/2 cup mayonnaise
2 cups grated Parmesan cheese
1 teaspoon Worcestershire sauce (optional, for added depth)
1/2 teaspoon garlic powder
Salt and freshly ground black pepper to taste
How to Make Greg’s Onion Soufflé Dip: Step-by-Step Guide
Preheat Oven: Preheat your oven to 350°F (175°C).
Combine Ingredients: In a large mixing bowl, combine the thawed and drained chopped onions, softened cream cheese, mayonnaise, 1 ½ cups of the Parmesan cheese, Worcestershire sauce (if using), and garlic powder. Mix until all ingredients are well combined and smooth. Season with salt and pepper to taste.
Transfer to Baking Dish: Spoon the mixture into a medium-sized baking dish (an 8×8 inch or similar will work well).
Top with Cheese: Sprinkle the remaining ½ cup of Parmesan cheese over the top of the dip.
Bake: Bake for 25-30 minutes, or until the dip is bubbly and the top is golden brown. The edges should be slightly caramelized, and the center should be hot and creamy.
Serve: Remove from the oven and let it cool for a few minutes before serving. Serve warm with your favorite crackers, crusty bread, or vegetable sticks.
Tips for Success
Drain Onions Thoroughly: Ensure your frozen chopped onions are completely thawed and well-drained. Excess moisture can make your easy onion soufflé dip watery.
Room Temperature Cream Cheese: Using softened cream cheese is crucial for a smooth, lump-free dip. Take it out of the refrigerator at least an hour before you start.
Don’t Overbake: While you want a golden top, overbaking can cause the dip to become too firm. Keep an eye on it, especially during the last 10 minutes.
Enhance Flavor: For an even richer homemade onion dip, consider caramelizing fresh onions before adding them to the mixture. This step adds a deeper, sweeter flavor profile.
Recipe Variations
Spicy Kick: Add a pinch of red pepper flakes or a dash of hot sauce to the mixture for a spicy hot onion soufflé dip.
Bacon Lover’s Dream: Crumble cooked bacon into the dip before baking for a smoky, savory addition.
Cheesy Twist: Experiment with other cheeses! Gruyere, cheddar, or a blend of Italian cheeses can add different dimensions to this cream cheese onion dip.
Herbaceous Delight: Stir in some fresh chopped chives or parsley for a burst of fresh flavor and color.
Frequently Asked Questions (FAQ)
How do I store this Greg’s Onion Soufflé Dip?
Leftover Greg’s Onion Soufflé Dip can be stored in an airtight container in the refrigerator for up to 3-4 days. Reheat gently in the oven or microwave until warmed through.
Can I prepare it in advance?
Absolutely! You can assemble the dip (without baking) up to 24 hours in advance. Cover it tightly and refrigerate. When ready to serve, let it sit at room temperature for about 30 minutes before baking as directed.
What can I serve it with?
This baked onion dip is incredibly versatile. It pairs wonderfully with a variety of dippers such as sturdy crackers, toasted baguette slices, pita chips, pretzel crisps, or fresh vegetable sticks like carrots, celery, and bell peppers. For a heartier option, serve it alongside grilled chicken or steak.
Conclusion
Greg’s Onion Soufflé Dip is more than just an appetizer; it’s a statement. Its rich, creamy texture and savory onion flavor make it an instant classic that will have everyone reaching for more. Whether you’re hosting a party or simply craving a comforting snack, this recipe is your go-to. So, gather your ingredients, follow these simple steps, and prepare to impress. Don’t forget to leave a comment below if you try this recipe and let us know how much you loved this easy onion soufflé dip! Happy dipping!
Chili for a Crowd


Are you hosting a big game day party, a family gathering, or just looking for a hearty, comforting meal that feeds an army? Look no further! This chili-for-a-crowd recipe is your ultimate solution. It’s not just any chili; it’s a robust, flavorful, and incredibly satisfying dish designed to be the star of any large gathering. Forget spending hours in the kitchen; this recipe is straightforward, uses simple ingredients, and delivers a taste that will have everyone asking for seconds. Get ready to impress your guests with minimal effort and maximum flavor!
Why You’ll Love This Chili for a Crowd Recipe
Feeds a Multitude: Perfectly scaled to serve a large group, making it ideal for parties, potlucks, or meal prepping.
Incredibly Flavorful: A rich blend of spices, tender meat, and hearty beans creates a deep, complex flavor profile that’s universally loved.
Simple & Straightforward: Despite its impressive taste, this easy chili recipe for groups is surprisingly simple to prepare, even for novice cooks.
Customizable: Easily adaptable to various dietary preferences and spice tolerances, ensuring everyone can enjoy a bowl.
Ingredients You’ll Need
3 lbs ground beef (80/20 lean)
2 large yellow onions, chopped
4 cloves garlic, minced
2 (28 ounce) cans crushed tomatoes
2 (15 ounce) cans diced tomatoes, undrained
2 (15 ounce) cans kidney beans, rinsed and drained
2 (15 ounce) cans pinto beans, rinsed and drained
1 (15 ounce) can black beans, rinsed and drained
1/2 cup chili powder
2 tablespoons ground cumin
1 tablespoon smoked paprika
1 teaspoon cayenne pepper (adjust to taste for heat)
1 teaspoon dried oregano
1/2 teaspoon salt
1/4 teaspoon black pepper
1/4 cup tomato paste
1/2 cup beef broth
Optional toppings: shredded cheddar cheese, sour cream, chopped green onions, jalapeños, corn chips
How to Make Chili for a Crowd: Step-by-Step Guide
Brown the Beef: In a very large pot or Dutch oven, brown the ground beef over medium-high heat, breaking it up with a spoon. Drain off any excess fat.
Sauté Aromatics: Add the chopped onions to the pot and cook until softened, about 5-7 minutes. Stir in the minced garlic and cook for another minute until fragrant.
Add Spices & Tomato Paste: Stir in the chili powder, cumin, smoked paprika, cayenne pepper, oregano, salt, and black pepper. Cook for 1-2 minutes, stirring constantly, to toast the spices. Add the tomato paste and cook for another minute.
Combine Wet Ingredients: Pour in the crushed tomatoes, diced tomatoes (with their juice), and beef broth. Stir well to combine all ingredients.
Add Beans: Stir in the rinsed and drained kidney beans, pinto beans, and black beans.
Simmer: Bring the chili to a gentle boil, then reduce the heat to low, cover, and simmer for at least 1.5 to 2 hours, stirring occasionally. The longer it simmers, the more the flavors will meld and deepen. For the best crowd-pleasing chili, allow it to simmer for 3-4 hours if time permits.
Taste and Adjust: Taste the chili and adjust seasonings as needed. You might want to add more salt, pepper, or a pinch more cayenne for extra kick.
Serve: Ladle hot chili into bowls and serve with your favorite toppings.
Tips for Success
Don’t Rush the Simmer: The key to a truly delicious homemade chili for parties is allowing it to simmer for an extended period. This lets the flavors develop and deepen, resulting in a richer, more complex taste.
Toast Your Spices: Briefly cooking the chili powder, cumin, and other dry spices with the aromatics before adding liquids helps to release their full flavor and aroma.
Adjust Heat Levels: If you’re serving a diverse group, consider starting with less cayenne pepper and offering hot sauce on the side for those who prefer more heat. This makes it a perfect crowd-pleasing chili for all.
Consider a Slow Cooker: For an even easier approach, after browning the beef and sautéing the aromatics, transfer everything to a large slow cooker. Cook on low for 6-8 hours or on high for 3-4 hours. This is an excellent method for a slow cooker chili for a crowd.
Recipe Variations
Smoky Chipotle Chili: Add 1-2 canned chipotle peppers in adobo sauce (minced) along with the crushed tomatoes for a deep, smoky heat.
Vegetarian/Vegan Option: Omit the ground beef and use extra beans (e.g., cannellini or great northern) or a plant-based ground substitute. Ensure to use vegetable broth instead of beef broth.
Spicy Sausage Kick: Replace half of the ground beef with spicy Italian sausage (casings removed) for an extra layer of flavor and heat.
Frequently Asked Questions (FAQ)
How do I store this Chili for a Crowd?
Leftover chili can be stored in an airtight container in the refrigerator for up to 3-4 days. It also freezes exceptionally well. Divide cooled chili into freezer-safe bags or containers and freeze for up to 3 months. Thaw overnight in the refrigerator before reheating.
Can I prepare it in advance?
Absolutely! Chili is one of those dishes that often tastes even better the next day as the flavors have more time to meld. Prepare it a day or two in advance, store it in the refrigerator, and gently reheat on the stovetop or in a slow cooker before serving. This makes it a fantastic option for a large batch chili recipe when entertaining.
What can I serve it with?
Chili is incredibly versatile! Classic accompaniments include cornbread, rice, tortilla chips, or a simple green salad. Don’t forget a variety of toppings like shredded cheese, sour cream, fresh cilantro, chopped red onion, or sliced avocado to let your guests customize their bowls.
Conclusion
This chili-for-a-crowd recipe is more than just a meal; it’s a comforting, satisfying experience designed to bring people together. Its rich flavors, hearty ingredients, and ease of preparation make it an undeniable winner for any occasion where good food and good company are paramount. So, gather your ingredients, fire up your pot, and get ready to create a memorable dish that will warm hearts and fill bellies. Don’t forget to leave a comment below if you try this recipe and let us know how it turned out!
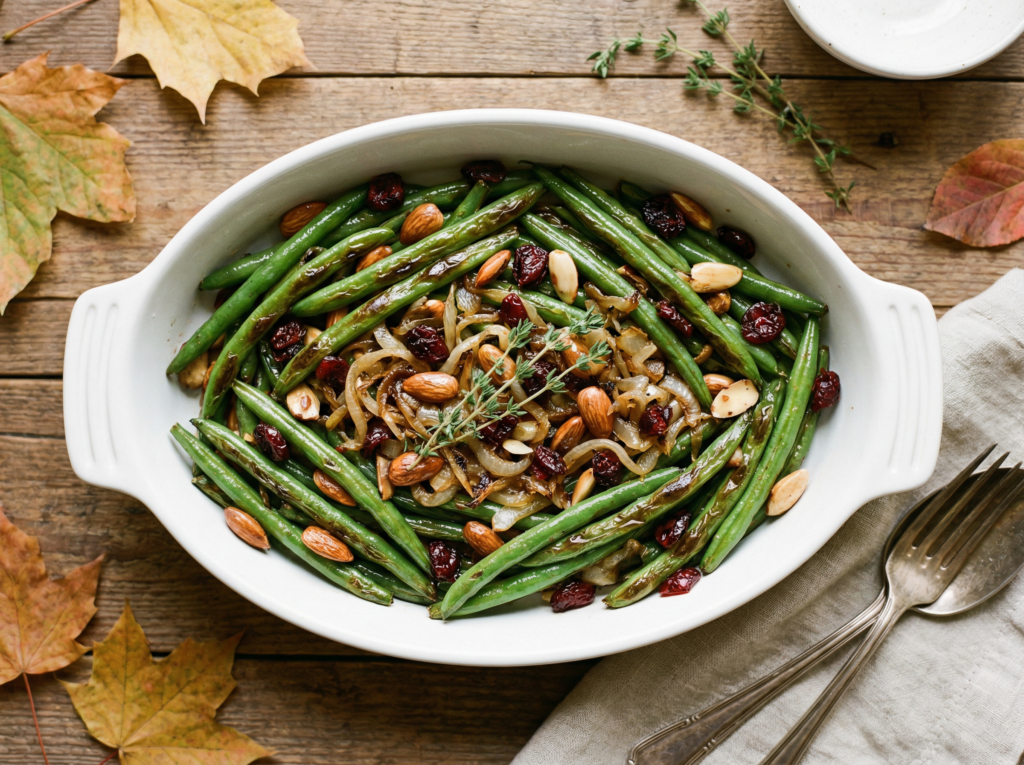
As the leaves turn golden and the air grows crisp, our palates naturally crave the comforting flavors of autumn. And what better way to celebrate the season’s bounty than with a vibrant, flavorful side dish? These Autumn Green Beans are more than just a simple vegetable; they’re a symphony of textures and tastes that perfectly complement any fall meal. Forget bland, steamed green beans – this recipe transforms them into a star, offering a delightful balance of tender-crisp beans, sweet maple glaze, crunchy pecans, and tart cranberries. It’s the easiest way to elevate your holiday table or a cozy weeknight dinner, bringing warmth and seasonal cheer to every bite.
Why You’ll Love This Autumn Green Beans Recipe
Quick and Easy: Ready in under 30 minutes, making it perfect for busy weeknights or as a last-minute addition to a holiday spread.
Simple Ingredients: Uses readily available ingredients that come together to create extraordinary flavor.
Amazing Autumnal Flavor: The combination of maple, pecans, and cranberries screams fall, offering a sweet, savory, and slightly tart profile.
Versatile Side Dish: Pairs beautifully with a wide range of main courses, from roasted chicken to holiday turkey.
Ingredients You’ll Need
To create this delightful fall green bean recipe, gather the following:
1.5 lbs fresh green beans, trimmed
2 tablespoons olive oil
2 cloves garlic, minced
1/4 cup maple syrup (pure maple syrup for best flavor)
1/4 cup chopped pecans
1/4 cup dried cranberries
1 tablespoon fresh thyme leaves, chopped (or 1 teaspoon dried thyme)
Salt and freshly ground black pepper to taste
How to Make Autumn Green Beans: Step-by-Step Guide
Follow these simple steps to prepare your perfect maple glazed green beans:
Prepare the Green Beans: Wash and trim the ends of your fresh green beans. If they are very long, you can snap them in half. Pat them dry thoroughly; this helps them roast better.
Sauté Aromatics: In a large skillet or oven-safe pan (if you plan to finish in the oven), heat the olive oil over medium heat. Add the minced garlic and sauté for about 1 minute until fragrant. Be careful not to burn the garlic.
Add Green Beans: Add the trimmed green beans to the skillet. Toss them with the garlic and olive oil. Cook for 5-7 minutes, stirring occasionally, until the beans are bright green and slightly tender-crisp. You want them to still have a bit of a bite.
Glaze and Season: Pour in the maple syrup, add the chopped pecans, dried cranberries, and fresh thyme. Toss everything together until the green beans are evenly coated. Season generously with salt and freshly ground black pepper.
Finish Cooking: Continue to cook for another 3-5 minutes, allowing the maple syrup to slightly reduce and create a beautiful glaze on the beans. The pecans will also toast slightly, enhancing their flavor and crunch. If you prefer a softer bean, you can cover the skillet for a few minutes during this stage. Alternatively, for a slightly more roasted finish, you can transfer the skillet to a preheated oven at 375°F (190°C) for 5-7 minutes.
Serve: Transfer the green beans with pecans and cranberries to a serving dish and serve immediately. Garnish with a few extra thyme sprigs or a sprinkle of fresh parsley if desired.
Tips for Success
Don’t Overcook: The key to delicious green beans is to keep them tender-crisp. Overcooked green beans can become mushy and lose their vibrant color. Keep an eye on them and taste test as you go.
Pat Dry: Ensure your green beans are thoroughly dry before adding them to the pan. Excess moisture can steam the beans instead of allowing them to sauté and develop a nice texture.
Pure Maple Syrup: For the best flavor in your maple glazed green beans, use pure maple syrup, not pancake syrup. The depth of flavor is incomparable and truly makes this dish shine as a holiday green bean side dish.
Toast Pecans Separately (Optional): If you want an even deeper nutty flavor, you can lightly toast the pecans in a dry skillet for a few minutes before adding them to the green beans. This brings out their natural oils and aroma.
Recipe Variations
Spicy Kick: Add a pinch of red pepper flakes along with the garlic for a subtle heat that complements the sweetness of the maple syrup.
Citrus Brightness: A squeeze of fresh orange or lemon juice (about 1 tablespoon) at the very end can add a bright, zesty finish to the dish, cutting through the richness.
Different Nuts/Fruits: Experiment with other nuts like walnuts or slivered almonds, and dried fruits such as dried cherries or apricots, to create your own unique easy autumn vegetable recipe.
Bacon or Prosciutto: For a savory twist, cook 2-3 slices of chopped bacon or prosciutto until crispy, then drain most of the fat. Add the cooked bacon/prosciutto back to the green beans along with the maple syrup and other ingredients.
Frequently Asked Questions (FAQ)
How do I store this Autumn Green Beans?
Leftover Autumn Green Beans can be stored in an airtight container in the refrigerator for up to 3-4 days. They are delicious reheated gently in a skillet or microwave, though the beans may lose a bit of their crispness.
Can I prepare it in advance?
While best served fresh, you can prepare the green beans by trimming them and mincing the garlic a day in advance. Store them separately in the refrigerator. The full dish can be cooked a few hours ahead and gently reheated, but for optimal texture, cooking just before serving is recommended for this fall green bean recipe.
What can I serve it with?
These versatile Autumn Green Beans make an excellent side dish for almost any fall or holiday meal. They pair wonderfully with roasted turkey, chicken, pork loin, or even a hearty steak. They also complement other seasonal vegetables like roasted sweet potatoes or butternut squash, making them a perfect addition to your holiday spread.
Conclusion
These Autumn Green Beans are more than just a side dish; they’re a celebration of fall flavors, combining the freshness of green beans with the warmth of maple, the crunch of pecans, and the tartness of cranberries. This recipe is incredibly easy to make, yet it delivers a sophisticated and satisfying taste that will impress your family and friends. Whether you’re looking for an easy autumn vegetable recipe for a weeknight dinner or a standout holiday green bean side dish, this recipe is sure to become a new favorite. Give it a try and bring the comforting essence of autumn to your table. Leave a comment below if you try this recipe and let us know what you think!
Teriyaki Salad Dressing

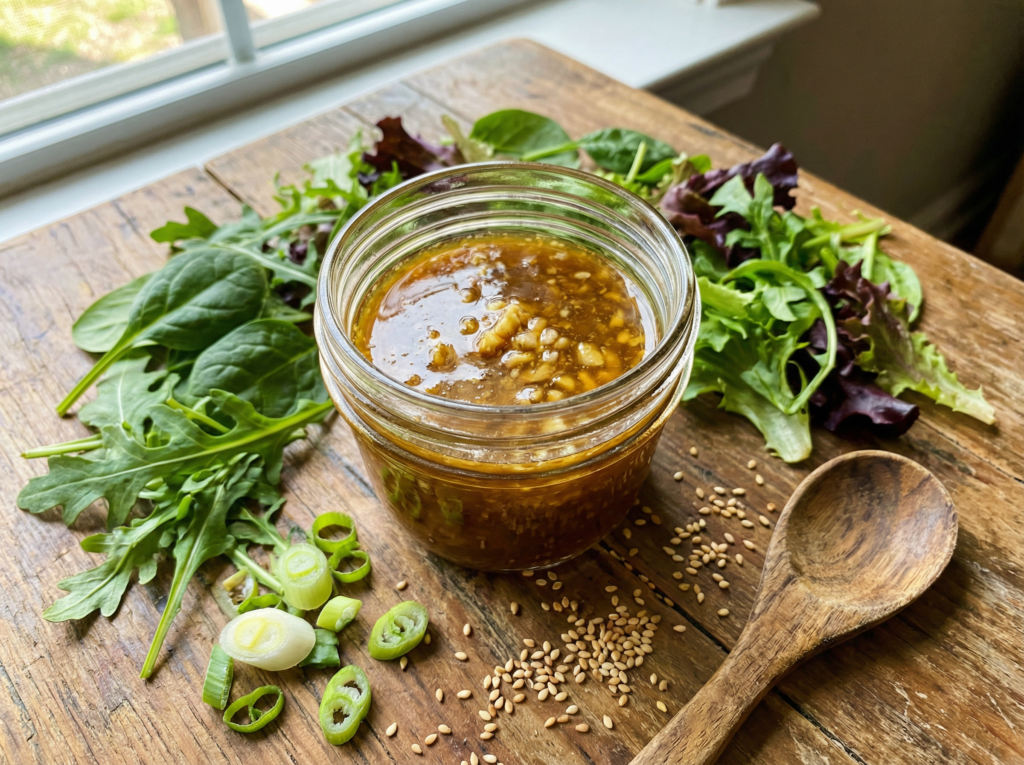
Are you tired of the same old salad dressings? Do you crave a burst of umami and a touch of sweetness to elevate your greens? Look no further! This teriyaki salad dressing recipe is your ticket to transforming ordinary salads into extraordinary culinary experiences. Forget store-bought versions filled with unpronounceable ingredients; this homemade dressing is incredibly easy to make, packed with fresh flavors, and will quickly become a staple in your kitchen. It’s the perfect way to add a vibrant, savory-sweet kick to any meal, making even the simplest salad feel gourmet.
Why You’ll Love This Teriyaki Salad Dressing Recipe
Quick and Easy: With minimal prep and simple steps, you can whip up this delicious dressing in under 10 minutes. It’s perfect for busy weeknights or when you need a last-minute flavor boost.
Simple Ingredients: You likely have most of the ingredients in your pantry right now! No obscure or hard-to-find items are needed, making this a convenient and budget-friendly option.
Amazing Flavor: This dressing strikes a perfect balance between savory, sweet, and tangy. The rich teriyaki notes are complemented by a hint of ginger and garlic, creating an irresistible taste that will have you reaching for seconds.
Versatile: While it shines as a salad dressing, its uses extend far beyond! Drizzle it over grilled chicken, use it as a marinade, or even as a dipping sauce for spring rolls.
Ingredients You’ll Need
To create this delightful homemade teriyaki dressing, gather the following:
1/2 cup soy sauce (low-sodium recommended)
1/4 cup rice vinegar
2 tablespoons sesame oil
2 tablespoons honey or maple syrup (adjust to taste for sweetness)
1 tablespoon grated fresh ginger
2 cloves garlic, minced
1 teaspoon Dijon mustard
1/4 teaspoon black pepper
Optional: 1-2 tablespoons mayonnaise for a creamy teriyaki salad dressing
How to Make Teriyaki Salad Dressing: Step-by-Step Guide
Making your own easy teriyaki sauce recipe for salads is incredibly straightforward. Follow these simple steps:
Combine Ingredients: In a medium bowl or a jar with a tight-fitting lid, combine the soy sauce, rice vinegar, sesame oil, honey (or maple syrup), grated ginger, minced garlic, Dijon mustard, and black pepper.
Whisk or Shake: If using a bowl, whisk all ingredients vigorously until well combined and the honey has dissolved. If using a jar, secure the lid tightly and shake well until everything is thoroughly mixed.
Taste and Adjust: Taste the dressing and adjust seasonings as needed. You might want more sweetness, tanginess, or a stronger ginger/garlic kick. If you prefer a creamy teriyaki salad dressing, now is the time to whisk in the mayonnaise.
Serve or Store: Your delicious teriyaki salad dressing is ready to use! Drizzle it over your favorite greens immediately, or store it for later.
Tips for Success
Fresh Ingredients are Key: Always use fresh ginger and garlic for the best flavor. Pre-minced or powdered versions won’t give you the same vibrant taste.
Adjust Sweetness: The amount of honey or maple syrup can be adjusted to your preference. Start with less and add more if you like a sweeter dressing.
Shake Well Before Each Use: Ingredients can separate over time, especially if you’ve added mayonnaise for a creamy teriyaki salad dressing. Give it a good shake or whisk before each use to ensure consistency.
Consider a Quality Soy Sauce: Since soy sauce is a primary ingredient, a good quality, low-sodium option will make a noticeable difference in the final flavor of your Japanese salad dressing.
Recipe Variations
Spicy Kick: Add a pinch of red pepper flakes or a dash of sriracha to the mixture for a spicy version of this homemade teriyaki dressing.
Citrus Boost: Incorporate a squeeze of fresh lime or orange juice for an extra layer of brightness and tang.
Nutty Flavor: A tablespoon of peanut butter or almond butter can be whisked in for a richer, nuttier, and even creamier texture, reminiscent of some teriyaki restaurant salad dressing styles.
Vegan Version: Ensure you use maple syrup instead of honey, and if making it creamy, use a vegan mayonnaise.
Frequently Asked Questions (FAQ)
How do I store this Teriyaki Salad Dressing?
Store the dressing in an airtight container or jar in the refrigerator for up to 5-7 days. The flavors will meld and deepen over time, making it even more delicious.
Can I prepare it in advance?
Absolutely! This homemade teriyaki dressing is perfect for meal prep. Make a batch at the beginning of the week, and it will be ready to go whenever you need it. Just remember to give it a good shake before serving.
What can I serve it with?
This versatile dressing pairs wonderfully with a variety of dishes. It’s fantastic on green salads with grilled chicken or tofu, as a marinade for fish or vegetables, or even as a dipping sauce for dumplings, spring rolls, or fresh veggie sticks. It’s also a great way to liven up a simple bowl of rice and steamed vegetables.
Conclusion
Elevate your everyday meals with this incredible teriyaki salad dressing. It’s simple, flavorful, and infinitely customizable, proving that homemade is always best. Say goodbye to bland salads and hello to a vibrant, savory-sweet experience that will delight your taste buds. Give this easy teriyaki sauce recipe a try today, and don’t forget to leave a comment below if you love it as much as we do! Happy cooking!
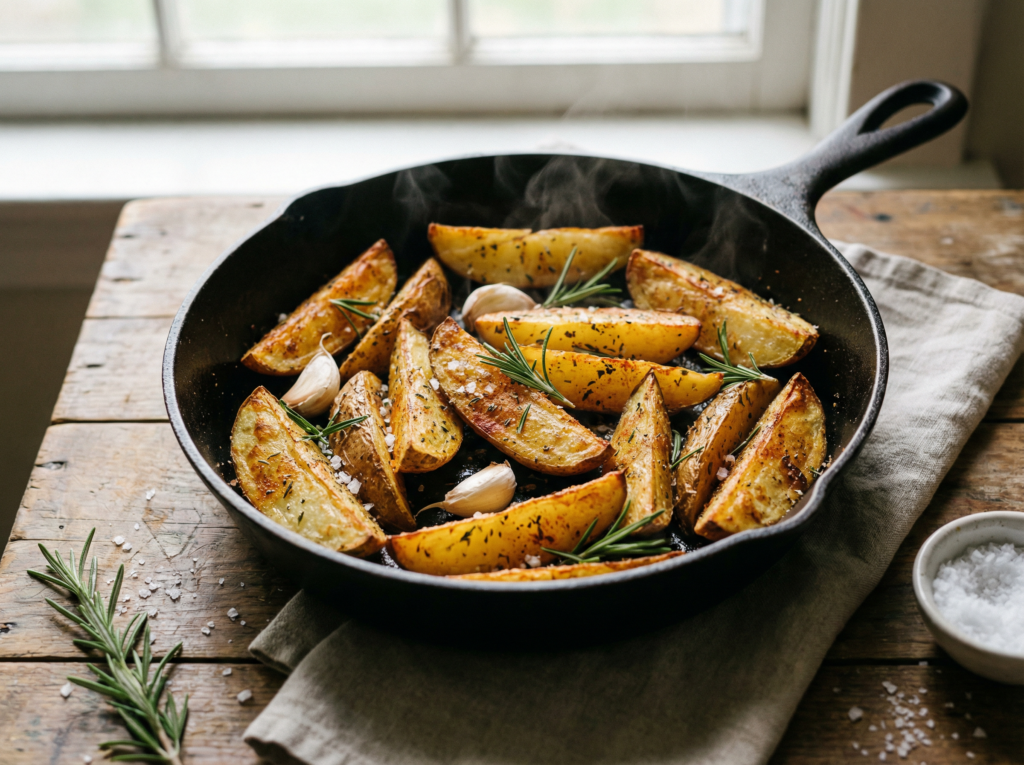
Truffle Tater Tots: An Irresistible Gourmet Twist on a Classic Snack


Are you ready to elevate your snack game to an entirely new level? Forget everything you thought you knew about humble tater tots, because we’re about to introduce you to a culinary revelation: Truffle Tater Tots. This recipe takes the beloved crispy potato bites and infuses them with the luxurious, earthy aroma of truffle, transforming a simple side dish into an unforgettable gourmet experience. Whether you’re hosting a sophisticated dinner party, looking for an impressive appetizer, or simply craving a decadent treat, these truffle-tater-tots are surprisingly easy to make and guaranteed to be a showstopper. Get ready to impress your taste buds and your guests with this extraordinary twist on a classic.
Why You’ll Love This Truffle Tater Tots Recipe
Gourmet Flavor, Simple Preparation: Achieve a high-end restaurant taste with minimal effort. The magic of truffle oil transforms ordinary tots into something extraordinary.
Crowd-Pleaser: Perfect for parties, game nights, or as a sophisticated appetizer. Everyone, from kids to adults, will adore these.
Versatile: Serve them as a side dish, a decadent snack, or even as a base for creative loaded tot variations.
Customizable: Easily adjust the intensity of the truffle flavor or add other seasonings to suit your preference.
Ingredients You’ll Need
To create these magnificent truffle tater tots, gather the following ingredients:
1 (32-ounce) bag frozen tater tots (choose a good quality brand for best results)
2 tablespoons olive oil (or a neutral oil like avocado oil)
1-2 tablespoons white truffle oil (adjust to your taste – a little goes a long way!)
1/4 cup grated Parmesan cheese (freshly grated is highly recommended)
2 tablespoons fresh parsley, finely chopped
1 clove garlic, minced (optional, for an extra flavor kick)
Salt and freshly ground black pepper to taste
How to Make Truffle Tater Tots: Step-by-Step Guide
Follow these simple steps to create your own batch of irresistible truffle tater tots:
Preheat Oven: Preheat your oven to 425°F (220°C). Line a large baking sheet with parchment paper for easy cleanup and to prevent sticking.
Arrange Tater Tots: Spread the frozen tater tots in a single layer on the prepared baking sheet. Ensure they are not overcrowded, as this will prevent them from getting crispy.
Bake Tater Tots: Bake for 20-25 minutes, or until golden brown and crispy. Flip them halfway through baking to ensure even crispiness on all sides. The exact baking time may vary depending on your oven and the brand of tater tots.
Prepare Truffle Mixture: While the tater tots are baking, in a large heatproof bowl, combine the olive oil, truffle oil, grated Parmesan cheese, chopped parsley, and minced garlic (if using). Stir well to combine all ingredients.
Toss with Truffle: Once the tater tots are perfectly crispy, remove them from the oven and immediately transfer them to the bowl with the truffle mixture. Toss gently but thoroughly to coat all the tater tots evenly. The heat from the tots will help the Parmesan melt slightly and adhere to the tots.
Season and Serve: Season with salt and freshly ground black pepper to taste. Serve immediately and enjoy your gourmet truffle tater tots!
Tips for Success
Don’t Overcrowd the Pan: For the crispiest homemade truffle tots, ensure your tater tots are spread in a single layer on the baking sheet. If necessary, use two baking sheets.
Quality Truffle Oil Matters: Invest in a good quality white truffle oil. The flavor can vary significantly between brands, and a better oil will yield a more authentic and delicious truffle flavor in your gourmet tater tots.
Serve Immediately: Truffle tater tots are best enjoyed fresh out of the oven when they are at their crispiest and the truffle aroma is most potent.
Adjust Truffle Oil to Taste: Truffle oil is potent. Start with 1 tablespoon and add more if you desire a stronger truffle flavor. It’s easier to add more than to take away!
Recipe Variations
Spicy Truffle Tots: Add a pinch of red pepper flakes to the truffle mixture for a subtle kick, or drizzle with a touch of sriracha mayo after baking.
Cheesy Truffle Tots: In addition to Parmesan, toss the hot tots with a blend of shredded mozzarella and cheddar for an extra gooey, cheesy experience. You can even melt the cheese under the broiler for a minute or two.
Herbaceous Truffle Tots: Experiment with other fresh herbs like chives, thyme, or rosemary in addition to or instead of parsley for different aromatic profiles. These variations make for truly unique truffle potato bites.
Garlic Parmesan Truffle Tots: Increase the amount of minced garlic in the truffle mixture for a more pronounced garlic flavor, complementing the truffle beautifully.
Frequently Asked Questions (FAQ)
How do I store these Truffle Tater Tots?
While Truffle Tater Tots are best enjoyed fresh, you can store any leftovers in an airtight container in the refrigerator for up to 2-3 days. Reheat them in an oven or air fryer at 375°F (190°C) until crispy again. Microwaving is not recommended as it will make them soggy.
Can I prepare it in advance?
It’s best to prepare the truffle mixture in advance and bake the tater tots just before serving. The tater tots lose their crispiness quickly, and the truffle aroma is most vibrant when freshly tossed. However, you can chop the parsley and mince the garlic ahead of time to speed up the process.
What can I serve it with?
Truffle Tater Tots are incredibly versatile! They make a fantastic side dish for burgers, steaks, roasted chicken, or even a simple sandwich. They also shine as an appetizer with a creamy dipping sauce like aioli, ranch, or a spicy sriracha mayo. For a truly indulgent experience, serve them alongside a gourmet mac and cheese or a rich mushroom risotto.
Conclusion
There you have it – a simple yet sophisticated way to transform ordinary tater tots into an extraordinary culinary delight. These Truffle Tater Tots are more than just a snack; they’re an experience, offering a perfect blend of crispy texture and earthy, aromatic truffle flavor. They’re easy enough for a weeknight treat but elegant enough to impress at any gathering. So, go ahead, give this recipe a try, and prepare to fall in love with your new favorite gourmet snack. Leave a comment below if you try this recipe and let us know what you think! We love hearing from you.
Powderhorn Potatoes: The Ultimate Cheesy Potato Bake

Introduction
Are you searching for a side dish that will steal the show at any gathering? Look no further than Powderhorn Potatoes! This incredibly delicious and comforting potato casserole is the easiest way to make a crowd-pleasing dish that combines tender potatoes with a rich, creamy, and cheesy sauce. Perfect for holidays, potlucks, or a cozy family dinner, these potatoes are guaranteed to become a new favorite. Get ready to impress your guests with this simple yet spectacular recipe!
Why You’ll Love This Powderhorn Potatoes Recipe
Irresistibly Cheesy: Layers of melted cheese create a decadent and satisfying experience.
Simple Ingredients: Made with common pantry staples, making it easy to whip up anytime.
Crowd-Pleaser: A guaranteed hit at any potluck, holiday meal, or family dinner.
Versatile Side Dish: Pairs perfectly with a variety of main courses, from roasted chicken to grilled steak.
Ingredients You’ll Need
To create this delightful cheesy potato bake, you’ll need the following:
3.5-4 lbs baking potatoes (such as Russet or Yukon Gold)
1/2 cup unsalted butter, melted
2.5 cups shredded cheddar cheese (sharp or mild, depending on preference)
2 cups sour cream
2 tablespoons chopped green onions (for garnish and flavor)
1/2 teaspoon salt
1/4 teaspoon black pepper
Optional: A pinch of cayenne pepper for a subtle kick
How to Make Powderhorn Potatoes: Step-by-Step Guide
Follow these simple steps to prepare your perfect Powderhorn Potatoes:
Prepare the Potatoes: Preheat your oven to 400°F (200°C). Wash the potatoes thoroughly. Bake them in their jackets for about 40-50 minutes, or until they are tender but still firm enough to handle. Alternatively, you can boil them until tender. Once cooked, let them cool slightly, then peel and grate them using a box grater or a food processor.
Combine Ingredients: In a large mixing bowl, combine the melted butter, 2 cups of shredded cheddar cheese, sour cream, salt, black pepper, and cayenne pepper (if using). Mix well until all ingredients are thoroughly combined and the mixture is smooth and creamy.
Add Potatoes: Gently fold the grated potatoes into the cheese and sour cream mixture. Be careful not to overmix, as this can make the potatoes starchy.
Assemble the Casserole: Lightly grease a 9×13 inch baking dish. Pour the potato mixture into the prepared dish, spreading it evenly.
Top with Cheese: Sprinkle the remaining 1/2 cup of shredded cheddar cheese over the top of the potato mixture.
Bake: Reduce the oven temperature to 350°F (175°C). Bake for 30-40 minutes, or until the casserole is bubbly around the edges and the cheese on top is melted and golden brown. For an extra crispy top, you can broil for the last 2-3 minutes, watching carefully to prevent burning.
Garnish and Serve: Remove from the oven and let it rest for a few minutes before serving. Garnish with fresh chopped green onions.
Tips for Success
Don’t Overcook Potatoes: When pre-baking or boiling the potatoes, ensure they are tender but not mushy. This will help them hold their shape when grated and prevent a watery casserole.
Room Temperature Sour Cream: Using sour cream at room temperature will help it mix more smoothly with the other ingredients, creating a more uniform sauce for your potato casserole recipe.
Freshly Grated Cheese: While pre-shredded cheese is convenient, freshly grated cheddar melts more smoothly and has a better flavor, contributing to a superior cheesy potato bake.
Season to Taste: Always taste your mixture before baking and adjust salt and pepper as needed. A little extra seasoning can make a big difference in this easy potato side dish.
Recipe Variations
Spicy Kick: Add a diced jalapeño or a teaspoon of red pepper flakes to the potato mixture for a fiery twist.
Bacon Lover’s Dream: Crumble cooked bacon bits into the potato mixture or sprinkle them on top with the cheese before baking for an extra layer of savory flavor.
Herbaceous Delight: Incorporate fresh herbs like chives, parsley, or dill into the sour cream mixture for a fragrant and fresh variation.
Loaded Potato Style: Add cooked, crumbled bacon, extra green onions, and a dollop of extra sour cream on top of individual servings for a “loaded baked potato” experience.
Frequently Asked Questions (FAQ)
How do I store this Powderhorn Potatoes?
Leftover Powderhorn Potatoes can be stored in an airtight container in the refrigerator for up to 3-4 days. Reheat gently in the oven or microwave until warmed through.
Can I prepare it in advance?
Yes, you can! Assemble the casserole up to the point of baking, cover it tightly with plastic wrap or foil, and refrigerate for up to 24 hours. When ready to bake, remove it from the refrigerator about 30 minutes before baking to allow it to come closer to room temperature, then bake as directed, possibly adding an extra 10-15 minutes to the baking time.
What can I serve it with?
Powderhorn Potatoes are an incredibly versatile side dish. They pair wonderfully with roasted meats like chicken, turkey, or pork loin. They also complement grilled steaks, ham, or even a simple weeknight meatloaf. For a complete meal, serve them alongside a fresh green salad or steamed vegetables.
Conclusion
There you have it – a recipe for Powderhorn Potatoes that is sure to become a staple in your kitchen. This delightful potato casserole recipe offers a perfect blend of creamy, cheesy goodness with minimal effort. Whether you’re hosting a dinner party or simply craving a comforting meal, this easy potato side dish is the answer. Don’t hesitate to try this recipe; your taste buds will thank you! If you give it a try, be sure to leave a comment below and let us know how it turned out! Happy cooking!
Jacquie’s Serbian Spinach Casserole

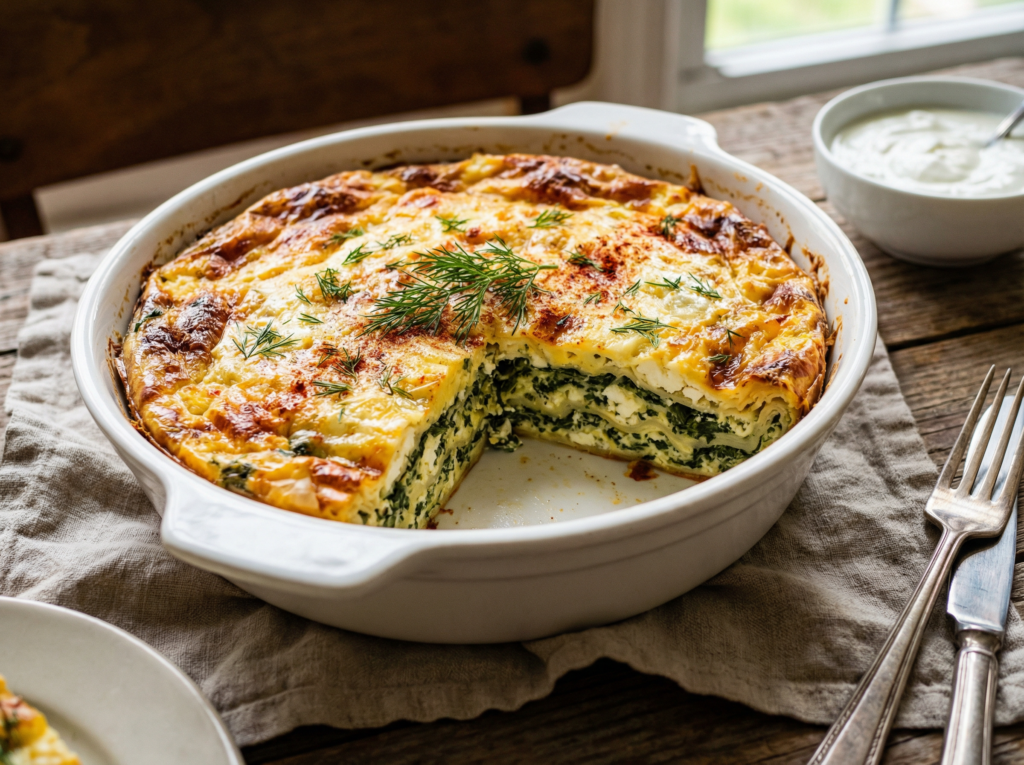
There’s something incredibly comforting about a dish that transports you to another place with just one bite. Jacquie’s Serbian Spinach Casserole is precisely that kind of culinary journey. This hearty and flavorful bake, deeply rooted in Balkan traditions, combines tender spinach, savory feta, and a rich, creamy egg mixture, all nestled within delicate layers. It’s a dish that speaks of home-cooked warmth and generations of culinary wisdom. Whether you’re looking for a satisfying weeknight meal, a show-stopping side dish, or a unique vegetarian option, this Jacquie’s Serbian Spinach Casserole offers a delightful blend of textures and tastes that will quickly become a family favorite. It’s not just a recipe; it’s an experience, bringing a touch of Serbian hospitality to your table with surprising ease.
Why You’ll Love This Jacquie’s Serbian Spinach Casserole Recipe
This isn’t just another casserole; it’s a dish designed to impress and satisfy. Here’s why you’ll find yourself coming back to this easy spinach casserole recipe again and again:
Hearty and Comforting: Perfect for any season, this casserole provides a deeply satisfying and wholesome meal that feels like a warm hug. It’s substantial enough to be a main course but also makes an excellent side.
Nutrient-Packed: Loaded with fresh spinach, eggs, and dairy, it’s a powerhouse of vitamins, minerals, and protein. It’s a delicious way to get your greens in!
Versatile and Adaptable: While the traditional recipe is fantastic, it’s also incredibly forgiving. You can easily adjust ingredients to suit your taste or what you have on hand, making it a truly flexible dish.
Easy to Prepare: Despite its impressive appearance and rich flavor, this Serbian spinach bake is surprisingly straightforward to assemble. With clear, step-by-step instructions, even novice cooks can achieve perfect results.
Ingredients You’ll Need
To create this delightful traditional spinach casserole, gather the following fresh and flavorful ingredients:
2 lbs (approx. 900g) fresh spinach, washed and tough stems removed
1 large onion, finely chopped
3 cloves garlic, minced
1/4 cup olive oil, divided
1 cup crumbled feta cheese
1/2 cup cottage cheese (or ricotta for a creamier texture)
4 large eggs
1 cup plain Greek yogurt (full-fat recommended for richness)
1/2 cup milk
1/4 cup all-purpose flour
1 teaspoon baking powder
Salt and freshly ground black pepper to taste
Pinch of nutmeg
Optional: 1/4 cup chopped fresh dill or parsley
How to Make Jacquie’s Serbian Spinach Casserole: Step-by-Step Guide
Follow these simple steps to create your own delicious Jacquie’s Serbian Spinach Casserole:
Prepare the Spinach: Blanch the fresh spinach in boiling salted water for 1-2 minutes until wilted. Immediately transfer to an ice bath to stop cooking, then drain thoroughly. Squeeze out as much excess water as possible. Roughly chop the spinach and set aside.
Sauté Aromatics: In a large skillet, heat 2 tablespoons of olive oil over medium heat. Add the chopped onion and cook until softened and translucent, about 5-7 minutes. Add the minced garlic and cook for another minute until fragrant. Remove from heat.
Combine Filling: In a large mixing bowl, combine the squeezed and chopped spinach, sautéed onion and garlic, crumbled feta cheese, and cottage cheese. If using, stir in the fresh dill or parsley. Season with salt, pepper, and a pinch of nutmeg. Mix well to combine all ingredients evenly.
Prepare Egg Mixture: In a separate bowl, whisk together the eggs, Greek yogurt, milk, flour, and baking powder until smooth. Ensure there are no lumps from the flour. Season lightly with salt and pepper.
Assemble the Casserole: Preheat your oven to 375°F (190°C). Lightly grease a 9×13 inch (23×33 cm) baking dish with the remaining olive oil. Spread the spinach and cheese mixture evenly into the prepared baking dish. Pour the egg and yogurt mixture over the spinach layer, ensuring it covers everything evenly.
Bake: Place the casserole in the preheated oven and bake for 40-50 minutes, or until the top is golden brown and the center is set. A knife inserted into the center should come out clean. If the top browns too quickly, you can loosely cover it with foil.
Rest and Serve: Once baked, remove the casserole from the oven and let it rest for 5-10 minutes before slicing and serving. This allows the casserole to set further and makes for cleaner slices.
Tips for Success
Achieving the perfect Balkan spinach dish is all about a few key details. Keep these pro tips in mind for a truly outstanding result:
Drain the Spinach Thoroughly: This is perhaps the most crucial step. Excess water from the spinach can make your casserole watery and prevent it from setting properly. Squeeze it out with your hands, a clean kitchen towel, or a potato ricer until it’s as dry as possible.
Don’t Overmix the Egg Mixture: Whisk the eggs, yogurt, and flour just until combined and smooth. Overmixing can develop the gluten in the flour too much, leading to a tougher texture.
Adjust Seasoning: Feta cheese is quite salty, so taste your spinach mixture before adding too much salt. Adjust to your preference, keeping in mind the overall saltiness of the cheese.
Bake Until Golden: The beautiful golden-brown crust isn’t just for looks; it indicates that the casserole is fully cooked through and has developed a delicious caramelized flavor on top. This ensures a perfect healthy spinach bake every time.
Recipe Variations
This Jacquie’s Serbian Spinach Casserole is wonderful as is, but it also lends itself beautifully to creative variations:
Add Meat: For a heartier, non-vegetarian version, brown 1/2 lb (225g) of ground beef or lamb with the onions and garlic. Drain any excess fat before mixing it with the spinach and cheese.
Different Cheeses: While feta is traditional, you can experiment with other cheeses. Try adding some grated Parmesan, Gruyere, or even a mild goat cheese for different flavor profiles. A blend of cheeses can also be delightful.
Vegetable Boost: Enhance the nutritional value and flavor by adding other finely chopped vegetables to the spinach mixture. Sautéed mushrooms, bell peppers, or even grated zucchini (also thoroughly drained) would be excellent additions.
Spicy Kick: For those who enjoy a bit of heat, a pinch of red pepper flakes added to the onion and garlic mixture, or a dash of hot sauce in the egg mixture, can provide a pleasant warmth.
Frequently Asked Questions (FAQ)
How do I store this Jacquie’s Serbian Spinach Casserole?
Leftover Jacquie’s Serbian Spinach Casserole can be stored in an airtight container in the refrigerator for up to 3-4 days. To reheat, you can warm individual portions in the microwave or place the entire casserole back in the oven at 300°F (150°C) until heated through.
Can I prepare it in advance?
Yes, you can prepare the casserole in advance! You can assemble the entire casserole, cover it tightly with plastic wrap, and refrigerate it for up to 24 hours before baking. Let it sit at room temperature for about 30 minutes before baking, and you might need to add an extra 5-10 minutes to the baking time.
What can I serve it with?
This versatile Serbian spinach bake pairs wonderfully with a variety of dishes. It’s excellent alongside roasted meats like chicken or lamb, or as a main vegetarian course with a simple green salad and crusty bread. A dollop of extra Greek yogurt or sour cream on top can also be a refreshing addition.
Conclusion
Jacquie’s Serbian Spinach Casserole is more than just a meal; it’s a celebration of simple, wholesome ingredients transformed into something truly extraordinary. Its rich flavors, comforting textures, and ease of preparation make it an ideal choice for any occasion. Whether you’re a seasoned cook or just starting your culinary journey, this traditional spinach casserole is sure to impress. So, gather your ingredients, follow these steps, and prepare to enjoy a taste of Serbian tradition right in your own home. Don’t forget to leave a comment below if you try this recipe and let us know what you think!
Ina Garten’s Dinner Spanakopitas: A Culinary Delight


Welcome to a culinary journey where classic comfort meets gourmet simplicity! If you’re searching for a dish that effortlessly combines flaky pastry, savory fillings, and a touch of elegance, then Ina Garten’s Dinner Spanakopitas is precisely what you need. This iconic recipe, beloved by home cooks and food enthusiasts alike, offers a delightful twist on the traditional Greek spinach pie, making it perfect for a weeknight meal or a sophisticated dinner party. Ina Garten’s approach simplifies the process without sacrificing any of the rich, authentic flavors that make spanakopita so irresistible. Get ready to impress your family and friends with this surprisingly easy yet incredibly delicious dish that will quickly become a staple in your kitchen. We’ll guide you through every step to create the perfect homemade spanakopita recipe that tastes like it came straight from a Greek taverna.
Why You’ll Love This Ina Garten’s Dinner Spanakopitas Recipe
There are countless reasons why this particular Ina Garten’s Dinner Spanakopitas recipe stands out and will quickly become a cherished favorite in your culinary repertoire. It’s more than just a meal; it’s an experience that combines convenience with gourmet taste.
Effortless Elegance: This recipe delivers a sophisticated dish with minimal fuss, making it ideal for both casual family dinners and special occasions. You don’t need to be a gourmet chef to achieve impressive results.
Flavorful & Satisfying: The combination of creamy feta, fresh spinach, and aromatic herbs encased in golden, crispy phyllo pastry is incredibly satisfying and packed with flavor. Each bite is a harmonious blend of textures and tastes that will transport you to the Mediterranean.
Versatile Meal: Perfect as a main course, a substantial side dish, or even cut into smaller portions for appetizers. This phyllo pastry dinner can adapt to any dining scenario, from a cozy night in to a festive gathering.
Make-Ahead Friendly: Many components can be prepared in advance, saving you time on busy days. This flexibility makes it an excellent choice for meal prepping or entertaining, allowing you to enjoy your guests rather than being stuck in the kitchen.
Healthy & Wholesome: Packed with nutrient-rich spinach and protein from feta and eggs, this easy spinach pie offers a balanced and wholesome meal option that doesn’t compromise on taste.
Ingredients You’ll Need for Your Delicious Ina Garten’s Dinner Spanakopitas
To create this magnificent Ina Garten’s Dinner Spanakopitas, gather the following high-quality ingredients. The freshness of your ingredients will significantly impact the final flavor of your homemade spanakopita recipe.
Fresh Spinach: 1 pound, washed thoroughly and roughly chopped. If fresh isn’t available, 10 ounces of frozen chopped spinach, thawed and meticulously squeezed dry, will work. Removing excess water is paramount for a non-soggy filling.
Olive Oil: 1 tablespoon, preferably extra virgin, for sautéing the aromatics and adding a rich, fruity note.
Yellow Onion: 1 large, finely chopped. It forms the sweet, aromatic base of our filling.
Garlic: 2 cloves, minced. Fresh garlic provides an indispensable pungent depth.
Fresh Dill: 1/2 cup, chopped. This herb is a cornerstone of Greek cuisine, offering a distinct, fresh flavor.
Fresh Parsley: 1/4 cup, chopped. Flat-leaf parsley is recommended for its vibrant color and peppery notes.
Fresh Mint: 1/4 cup, chopped (optional, but highly recommended for a fresh, bright kick). Mint adds an unexpected layer of complexity and freshness.
Feta Cheese: 12 ounces, crumbled. Opt for good quality Greek feta packed in brine for the best authentic flavor and creamy texture.
Large Eggs: 2, lightly beaten. These act as a binder for the filling, ensuring it holds together beautifully.
Freshly Ground Black Pepper: 1/4 teaspoon, to taste. Adds a subtle warmth and spice.
Ground Nutmeg: 1/8 teaspoon. A small pinch of nutmeg complements the spinach and feta wonderfully, a classic pairing in Greek cooking.
Phyllo Dough: 1 pound, thawed according to package directions. This delicate pastry is key to the spanakopita’s signature crispiness.
Unsalted Butter: 1 cup (2 sticks), melted. Essential for brushing between phyllo layers, creating that irresistible golden, flaky crust.
Note: When working with phyllo dough, ensure it remains covered with a damp towel to prevent it from drying out and cracking. This delicate pastry can become brittle very quickly if exposed to air.
How to Make Ina Garten’s Dinner Spanakopitas: A Detailed Step-by-Step Guide
Creating this easy spinach pie is a rewarding process. Follow these simple steps to achieve a perfect Ina Garten’s Dinner Spanakopitas that will impress everyone at your table.
Prepare the Spinach: If using fresh spinach, blanch it quickly in boiling water for 1-2 minutes until wilted. Immediately transfer to an ice bath to stop cooking, then drain well. The most critical step here is to squeeze out as much excess water as humanly possible. Use a clean kitchen towel or paper towels to wring it out thoroughly. Chop finely. If using frozen spinach, thaw it completely and then, again, squeeze out all excess liquid. This meticulous step is crucial to prevent a watery filling that could make your spanakopita soggy.
Sauté Aromatics: In a large skillet or sauté pan, heat the olive oil over medium heat. Add the finely chopped yellow onion and cook until it softens and becomes translucent, which usually takes about 5-7 minutes. Once the onion is soft, add the minced garlic and cook for another minute until it becomes fragrant. Be careful not to burn the garlic, as it can turn bitter.
Combine Filling: In a spacious mixing bowl, combine the prepared spinach, the sautéed onion and garlic mixture, fresh dill, fresh parsley, and the optional fresh mint. Add the crumbled feta cheese, the lightly beaten eggs, black pepper, and ground nutmeg. Mix everything thoroughly with your hands or a spoon until all ingredients are well combined and evenly distributed. Taste the mixture and adjust seasoning if necessary, keeping in mind that feta cheese is naturally quite salty.
Prepare Phyllo: Carefully unroll the thawed phyllo dough. It’s imperative to keep the unused sheets covered with a damp kitchen towel at all times to prevent them from drying out and becoming brittle. Melt the unsalted butter in a small saucepan over low heat or in the microwave until completely liquid.
Assemble the Spanakopita: Preheat your oven to 375°F (190°C). Lightly grease a 9×13 inch baking dish with some of the melted butter or cooking spray. Lay one sheet of phyllo dough in the bottom of the prepared dish, allowing any excess to hang over the sides. Lightly brush the entire surface of this phyllo sheet with melted butter. Repeat this process with 7 more sheets of phyllo, brushing each individual layer generously with butter. You will now have a sturdy base of 8 buttered phyllo layers.
Add Filling: Evenly spread the entire spinach and feta filling mixture over the phyllo base in the baking dish. Ensure it’s distributed from edge to edge.
Top with Phyllo: Lay another sheet of phyllo dough over the filling, and brush it with melted butter. Repeat with the remaining phyllo sheets, brushing each layer with butter. Once all layers are on top, carefully trim any excess phyllo hanging over the sides, or neatly fold it over the top to create a sealed edge. You can also crimp the edges for a decorative finish.
Score and Bake: Using a sharp knife, gently score the top layers of phyllo into your desired serving portions (squares or diamonds). Be careful not to cut all the way through to the filling, as this can cause the filling to leak during baking. This scoring will make it significantly easier to cut clean slices after baking. Bake for 45-55 minutes, or until the phyllo is beautifully golden brown and crispy, and the filling is set and bubbling slightly.
Cool and Serve: Once baked, remove the spanakopita from the oven and let it cool for at least 10-15 minutes before cutting along the scored lines and serving. This resting period allows the filling to firm up, preventing it from falling apart when sliced. Serve warm and enjoy your homemade masterpiece!
Tips for Success with Your Homemade Spanakopita
Achieving a perfect easy spinach pie requires attention to a few key details. These tips will help ensure your Ina Garten’s Dinner Spanakopitas turns out flawlessly every time.
Squeeze the Spinach Dry: This cannot be stressed enough. Excess moisture is the enemy of crispy phyllo. Use a clean kitchen towel or paper towels to really wring out the water from your spinach. A dry filling ensures a flaky crust.
Keep Phyllo Covered: Phyllo dough dries out incredibly quickly when exposed to air, becoming brittle and difficult to work with. Always keep the unused sheets covered with a damp cloth or plastic wrap while you are assembling your spanakopita.
Don’t Skimp on Butter: The melted butter is not just for flavor; it’s what gives the phyllo its incredible golden color and signature flaky texture. Brush generously between layers for the best results. It might seem like a lot, but it’s crucial for the authentic experience.
Pre-score for Clean Slices: Scoring the top layers before baking helps achieve neat, clean slices once the spanakopita is cooked and crispy. Trying to cut through crispy phyllo after baking can result in a messy, shattered crust.
Even Baking: Rotate your baking dish halfway through the baking time to ensure even browning and cooking of the phyllo and filling.
Recipe Variations for Your Greek Dinner
While the classic Ina Garten’s Dinner Spanakopitas is perfect as is, there are many ways to customize this Greek dinner recipe to suit your taste or dietary preferences. Get creative in your kitchen!
Add Other Greens: Experiment with adding other nutrient-rich greens like Swiss chard, kale, or even a mix of dandelion greens to the spinach mixture for a different flavor profile and added nutritional benefits. Just be sure to blanch and squeeze them dry as you would with spinach.
Meat Lover’s Spanakopita: For a heartier meal, brown some ground lamb or beef with the onions and garlic before adding it to the spinach and feta mixture. This transforms it into a more substantial and protein-packed dish, perfect for a cold evening.
Spicy Kick: Introduce a touch of heat by adding a pinch of red pepper flakes to the spinach filling. This adds an exciting dimension to the classic flavors and can be adjusted to your preferred level of spice.
Vegetable Boost: Incorporate finely diced bell peppers, zucchini, or mushrooms into the sautéed aromatic mixture for extra vegetables and texture.
Herb Variations: While dill, parsley, and mint are traditional, feel free to experiment with other Mediterranean herbs like oregano or marjoram for a slightly different aromatic profile.
Frequently Asked Questions (FAQ) About Ina Garten’s Dinner Spanakopitas
Here are some common questions about preparing and enjoying this delightful phyllo pastry dinner.
How do I store this Ina Garten’s Dinner Spanakopitas?
Leftover spanakopita can be stored in an airtight container in the refrigerator for up to 3-4 days. To reheat, place it in a preheated oven at 350°F (175°C) until warmed through and the phyllo is crispy again. Avoid microwaving, as it can make the phyllo soggy.
Can I prepare it in advance?
Yes, absolutely! This homemade spanakopita recipe is excellent for making ahead. You can assemble the entire spanakopita, cover it tightly with plastic wrap, and refrigerate it for up to 24 hours before baking. For longer storage, you can also freeze the unbaked spanakopita for up to 1 month. If baking from frozen, add an extra 15-20 minutes to the baking time and cover loosely with foil if the top starts to brown too quickly.
What can I serve it with?
Ina Garten’s Dinner Spanakopitas pairs wonderfully with a simple green salad dressed with a light lemon vinaigrette, a side of roasted vegetables (like asparagus or cherry tomatoes), or a bowl of creamy tzatziki sauce for dipping. It’s a versatile dish that complements many Mediterranean-inspired sides, making it a perfect centerpiece for a Greek dinner recipe spread.
Conclusion: Your Next Favorite Easy Spinach Pie
There you have it – a truly magnificent Ina Garten’s Dinner Spanakopitas recipe that brings the flavors of Greece right to your dinner table with the elegance and simplicity only Ina can deliver. This dish is a testament to how a few quality ingredients and straightforward steps can result in an incredibly satisfying and impressive meal. Whether you’re a seasoned cook or just starting your culinary adventures, this homemade spanakopita recipe is sure to delight. The flaky phyllo, the rich and savory filling, and the aromatic herbs create a symphony of flavors that will leave everyone asking for more. Don’t hesitate to try it out and experience the joy of flaky phyllo and a rich, savory filling. We encourage you to make this easy spinach pie your own and share your culinary creations. Leave a comment below if you try this recipe and let us know how it turned out! We love hearing from you and seeing your delicious results.
Houlihan’s Baked Potato Soup: A Comforting Classic You Can Make at Home


There’s something undeniably comforting about a rich, creamy bowl of Houlihan’s Baked Potato Soup. It’s a dish that evokes warmth, satisfaction, and a touch of nostalgic indulgence. If you’ve ever savored a spoonful of this beloved restaurant classic and wished you could recreate that magic in your own kitchen, you’re in luck. This recipe will guide you through crafting a homemade version that captures all the deliciousness of the original, making it the perfect meal for a chilly evening or a hearty lunch. Get ready to dive into a bowl of pure comfort with this incredible Houlihan’s Baked Potato Soup recipe.
Why You’ll Love This Houlihan’s Baked Potato Soup Recipe
This Houlihan’s Baked Potato Soup recipe is more than just a meal; it’s an experience. You’ll love it for its unforgettable flavor, delivering that signature rich, cheesy, and savory taste that makes Houlihan’s version so popular. The beauty of this recipe lies in its use of simple ingredients, many of which you likely already have in your pantry or can easily find at any grocery store. Beyond its deliciousness, this soup is incredibly hearty and satisfying, packed with potatoes, cheese, and bacon, ensuring you feel full and content after every spoonful. What’s more, it’s wonderfully customizable, allowing you to easily adapt the toppings and even the base to suit your personal preferences and dietary needs.
Ingredients You’ll Need
To create this delightful Houlihan’s Baked Potato Soup, gather the following essential ingredients:
6 medium Russet potatoes (about 2.5-3 lbs), baked and cooled to perfection.
6 slices thick-cut bacon, cooked until crispy and then crumbled, with 2 tablespoons of the rendered bacon fat reserved for later.
1 large yellow onion, finely chopped to release its sweet aroma.
2 cloves garlic, minced for an aromatic depth.
4 tablespoons unsalted butter, the foundation of a rich roux.
1/2 cup all-purpose flour, to create a smooth, thick base.
6 cups whole milk, for ultimate creaminess.
2 cups chicken broth (low sodium preferred), to enhance the savory notes.
1 cup heavy cream, for an extra touch of indulgence.
2 cups shredded sharp cheddar cheese, plus additional for topping, for that irresistible cheesy pull.
1/2 cup sour cream, to add a tangy counterpoint.
1/4 cup chopped fresh chives, plus more for topping, for a fresh, oniony finish.
1 teaspoon salt, or to taste, to perfectly balance the flavors.
1/2 teaspoon black pepper, or to taste, for a subtle kick.
How to Make Houlihan’s Baked Potato Soup: Step-by-Step Guide
Follow these detailed steps to create your own restaurant-quality Houlihan’s Baked Potato Soup:
Prepare the Potatoes: Begin by baking the Russet potatoes until they are perfectly tender. Once cooled enough to handle, carefully scoop out the creamy flesh, leaving a thin layer of skin. Roughly mash the potato flesh and set it aside. For an added textural element, you can dice some of the potato skin and incorporate it back into the mashed potatoes.
Cook the Bacon: In a large pot or Dutch oven, cook the thick-cut bacon slices until they are wonderfully crispy. Remove the cooked bacon, crumble it, and set it aside for garnish. Crucially, reserve 2 tablespoons of the rendered bacon fat in the pot; this will be the flavorful base for your soup.
Sauté Aromatics: Heat the reserved bacon fat along with the unsalted butter over medium heat. Add the finely chopped yellow onion and sauté until it becomes soft and translucent, typically taking about 5-7 minutes. Next, add the minced garlic and cook for just one more minute until it releases its fragrant aroma.
Make the Roux: Sprinkle the all-purpose flour evenly over the sautéed onion and garlic mixture. Cook, stirring constantly, for 2-3 minutes. This step is vital for creating a roux, which will act as the thickening agent for your luxurious soup.
Whisk in Liquids: Gradually and slowly whisk in the whole milk and chicken broth. It’s important to do this slowly to prevent any lumps from forming, ensuring a smooth soup base. Bring the mixture to a gentle simmer, stirring occasionally, and allow it to thicken slightly.
Add Potatoes and Cream: Stir in the mashed potatoes and the heavy cream. Continue to simmer the soup for 10-15 minutes, allowing all the flavors to meld beautifully and the soup to thicken further to your desired consistency. Remember to stir frequently to prevent the bottom from sticking.
Incorporate Cheese and Sour Cream: Remove the pot from the heat. Stir in the 2 cups of shredded sharp cheddar cheese until it is completely melted and the soup is smooth and creamy. Then, gently fold in the sour cream and the fresh chives. Season the soup with salt and black pepper to taste. Always remember to taste before adding too much salt, as the bacon and broth already contribute to the overall saltiness.
Serve: Ladle the hot, comforting soup into individual bowls. Garnish generously with extra shredded cheddar cheese, the crumbled crispy bacon, and a sprinkle of fresh chives. For an extra touch of decadence, a dollop of additional sour cream makes a fantastic topping.
Tips for Success
Achieving the perfect Houlihan’s Baked Potato Soup involves a few key techniques. Firstly, ensure your potatoes are perfectly baked and fork-tender; undercooked potatoes will result in a gritty texture. Baking them, rather than boiling, also concentrates their flavor and prevents a watery soup, which is crucial for a truly creamy potato soup recipe. Secondly, when adding the milk and broth, practice gradual liquid addition, whisking continuously to prevent lumps in your roux. A smooth roux is absolutely essential for a silky, restaurant-quality homemade baked potato soup. Always taste and adjust your soup before serving, as the saltiness can vary depending on your broth and bacon. Finally, a critical tip: don’t boil after adding dairy. Once you’ve incorporated the heavy cream, cheese, and sour cream, avoid bringing the soup to a rolling boil, as this can cause the dairy to curdle. Gentle simmering is always best for a rich, loaded potato soup.
Recipe Variations
This versatile Houlihan’s Baked Potato Soup can be easily adapted to suit various tastes and dietary preferences. For those who enjoy a spicy kick, consider adding a pinch of cayenne pepper or a dash of your favorite hot sauce along with the seasonings. If you’re looking for a vegetarian option, simply omit the bacon and substitute chicken broth with a high-quality vegetable broth; you can even add a touch of smoked paprika for a smoky flavor without the meat. A delightful Broccoli Cheddar variation can be achieved by stirring in 1 cup of steamed broccoli florets along with the cheese. For an extra cheesy experience, experiment with different types of cheese, such as Monterey Jack or Gruyere, to introduce a unique flavor profile to your restaurant-style potato soup.
Frequently Asked Questions (FAQ)
How do I store this Houlihan’s Baked Potato Soup?
To keep your leftover Houlihan’s Baked Potato Soup fresh, store it in an airtight container in the refrigerator for up to 3-4 days. When you’re ready to enjoy it again, reheat it gently on the stovetop over low heat, stirring occasionally. If the soup has thickened considerably in the refrigerator, you might need to add a splash of milk or broth to achieve your desired consistency.
Can I prepare it in advance?
Absolutely! This easy potato soup is an excellent candidate for advance preparation. You can prepare the soup base, which includes steps 1 through 6, and store it in the refrigerator. When you’re ready to serve, simply reheat the base and then proceed with adding the cheese, sour cream, and chives as outlined in step 7. This method significantly streamlines meal preparation.
What can I serve it with?
While this hearty Houlihan’s Baked Potato Soup is often satisfying enough to be a meal on its own, it also pairs wonderfully with a variety of accompaniments. Consider serving it alongside a crisp side salad, a slice of warm, crusty bread, or a simple sandwich for a complete meal. And of course, don’t forget the essential garnishes: a generous sprinkle of extra cheese, crumbled bacon, and fresh chives are a must for serving.
Conclusion
This homemade Houlihan’s Baked Potato Soup recipe truly brings the beloved restaurant classic right to your dining table. With its rich, creamy texture, savory bacon, and irresistible cheesy goodness, it’s a dish that promises warmth and satisfaction with every single spoonful. Whether you’re searching for a comforting weeknight dinner to soothe the soul or a crowd-pleasing appetizer to impress your guests, this recipe is sure to become a cherished family favorite. Don’t hesitate to try it out and experience the pure joy of crafting a truly delicious and easy potato soup from scratch. We’d love to hear about your culinary adventures, so please feel free to leave a comment below if you give this incredible recipe a try!